Can We Talk?
If you’re connecting a Sonoff SNZB-02 temperature and humidity sensor to a CC2531 Zigbee coordinator, you might run into the same issue that I first had – getting them to talk. When I first attempted this, my Zigbee2MQTT Bridge was not reporting anything from the SNZB-02 temperature and humidity sensor. After a bit of research and experimentation, I was finally able to get the SNZB-02, CC2531, and Zigbee2MQTT Bridge to all play nicely together. In this post, I will walk through the steps I took to make this work.
So, What Are the Steps?
The steps below outline the process I followed to get things working.
1. Remove the Battery
We start by removing the back of the SNZB-02 case. Typically, you can remove the cover by pulling up with your fingernails and working your way around the case. If it’s too tight, you might have to use a small, flat-bladed screwdriver to loosen it.
Once the case has been opened, remove the battery and the plastic insulator strip that separates the battery from the contacts. The plastic strip can be discarded.
2. Short Battery Leads
Next, let’s short the battery leads with a metal screwdriver (see image below) for 10 seconds. If the SNZB-02 has never had the battery fully installed (i.e., the plastic separator was just removed), you can likely skip this step. However, it’s only 10 seconds, so why not? 😉 This is to ensure the sensor starts from a clean state when power resumes.

3. Replace Battery
Simple enough… place the battery back into the sensor and snap the back cover onto the case.
4. Enable Zigbee2MQTT Joins
Before new devices are allowed to join your Zigbee2MQTT network, you’ll need to click the Permit join (All) button (see image below) on the Zigbee2MQTT dashboard. You can either permit joins on all routers or you can select a specific router if preferred (assuming you have multiple routers on your Zigbee network). For simplicity, let’s select “Permit join (All)”.

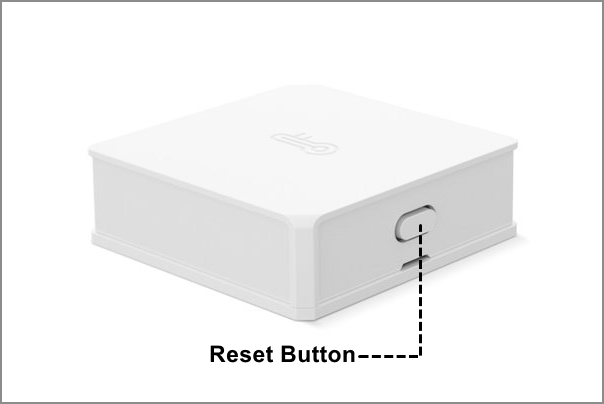
5. Put SNZB-02 into Pairing Mode
Press the reset button (see image below) on the Sonoff SNZB-02 for 3 to 5 seconds, until the LED on the front of the sensor blinks three times. This will put the sensor into pairing mode, allowing it to be detected by your Zigbee2MQTT bridge and join your network.
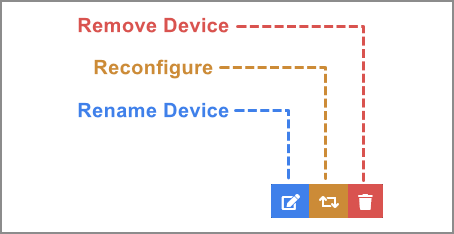
6. Rename the Sensor
To make it easier to remember what the sensor is for, rename your sensor in the Zigbee2MQTT dashboard by clicking on the “Rename device” icon (see image below). Use whatever naming convention works for you. As an example, I named one of my sensors “garage-th”.
At this point, you would expect the Zigbee2MQTT bridge to start receiving updates from the newly-added sensor. However, if your luck is similar to mine, you’ll find that nothing is being reported. That’s where the final step comes in.
7. The Final Step
After Zibgee2MQTT displays a messages that the new sensor has been registered, click on Reconfigure button (see image above) and then OK.
At this point, you should be good to go! You can verify this by clicking on the new device (in the Devices tab) and then selecting the Exposes tab.
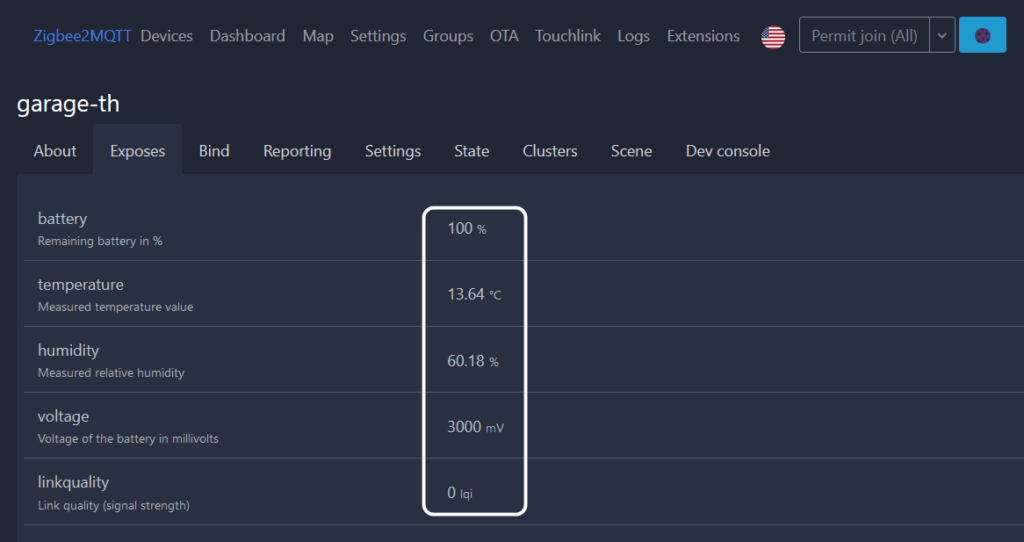
If all is well, you should see values for the various sensor readings, such as battery level, temperature, etc.
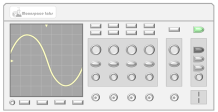
Let’s See It in Action
Using the above process, I now have a total of four Sonoff SNZB-02 temperature and humidity sensors throughout my house. I’ve been using them for several months now and they seem to be working fine.
Here is a screenshot of one of my Node-RED dashboards showing the temperature, humidity, and battery level values from these sensors:
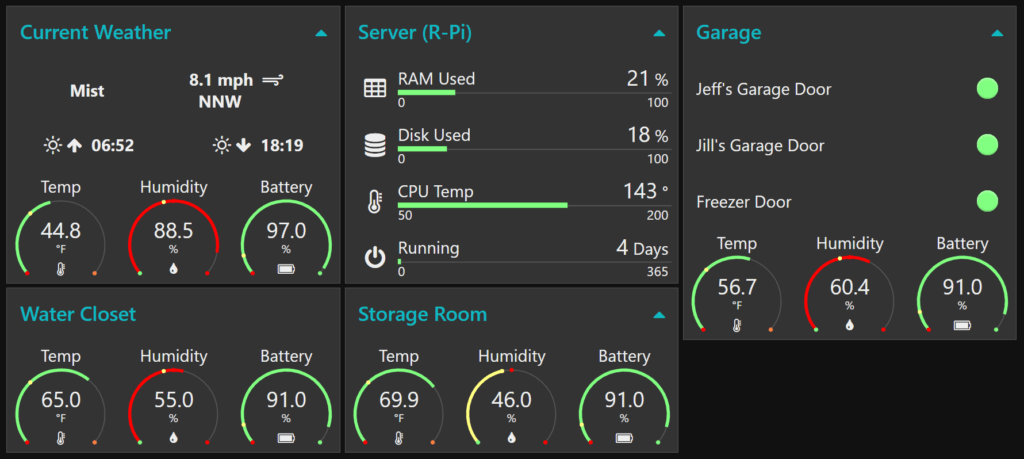
The values for Current Weather are coming from a Sonoff SNZB-02 sensor I placed on my front porch (beneath an overhang to keep it out of the rain and snow).
Summary
Prior to introducing the SNZB-02 sensors into my Zigbee2MQTT network, my sensors were based on home-grown designs using Arduino-compatible boards, a few custom discrete components (such as the DS18B20 temperature sensor), and even a custom PCB that I created for the sensors in my garage. While I enjoyed the process of creating those sensors, the SNZB-02 form factor is so much nicer. Now that I can reliably add these sensors to my Zigbee2MQTT network, I fully expect I’ll be adding other Sonoff sensors to my network down the road.
Are you using Sonoff sensors in your Zigbee2MQTT network? Let us know about it in the comments below.
Thanks!
P.S. I am also working on an instructional video that demonstrates the above steps. I’ll post a link back here once that has been completed.